Home
How to Draw and Use a Snoopy Outline for Any Craft Project
A character-accurate Snoopy outline relies on the Schulz Method , which prioritizes the head slope and bean-shaped torso over generic geometric shapes. For digital crafters, SVG files are the top choice for Cricut and Silhouette machines due to their infinite scalability. When working with physical mediums like Aida cloth for embroidery, using a single-thread backstitch is a highly effective way to maintain the fine facial details that define Snoopy's iconic look.
Why the Snoopy Outline Has Remained an Icon for Over 70 Years
Snoopy made his debut in the Peanuts comic strip on October 4, 1950. Initially, he appeared as a more realistic, quadrupedal beagle. However, as Charles Schulz’s artistic style evolved, so did Snoopy. By the late 1950s, he began to stand on two legs, a transition that allowed for the anthropomorphic expressions and imaginative personas we recognize today. According to official Peanuts history , this visual evolution was central to Snoopy's ability to "retreat into a fantasy" when the real world became too difficult.
The design philosophy behind the Snoopy outline is rooted in high-contrast minimalism. Charles Schulz utilized thick, deliberate ink lines that were both simple enough for a child to replicate and sophisticated enough to convey a wide range of emotions. This simplicity is exactly why Snoopy remains a popular choice for modern crafters. Whether it is a minimalist line-art tattoo, a vinyl decal for a laptop, or a complex CNC wood carving, the silhouette is instantly recognizable even without color.
Schulz often described Snoopy’s personality as "bittersweet." The outline reflects this; the slight curve of the mouth or the specific tilt of the head can shift the character from joyful to contemplative in a single stroke. For makers, this means that even a minor deviation in the outline can change the character's entire "vibe." Understanding the history of these lines helps crafters respect the legacy of the character while creating something new.
How to Draw the Perfect Snoopy Using the Official Schulz Method
Many amateur tutorials suggest starting with a circle for the head, but the Charles M. Schulz Museum teaches a specific "head-first" philosophy that captures the character's unique proportions more accurately. This method focuses on the flow of the line rather than rigid geometry.
The Head-First Philosophy
Schulz didn't view Snoopy as a collection of shapes, but as a series of connected curves. The most critical part of the drawing is the "slope of the head." If you get the forehead and nose curve wrong, the rest of the drawing will feel "off-brand." The nose should always be an oval, never a perfect circle, and the ears should hang with a specific weight that suggests soft fabric rather than rigid muscle.
Seven Steps to a Character-Accurate Sketch
- The Slope of the Head: Start with a gentle downward curve that rounds out into the snout. This line should be smooth and continuous.
- The Ear Curve: Attach the ear just behind the top of the head slope. It should look like a long, rounded flap that overlaps the back of the neck.
- The Eye and Collar: Place a simple dot for the eye, roughly centered between the nose and the ear. Add a thick, solid black line for the collar just below the head.
- The Nose and Smile: Draw a horizontal oval at the tip of the snout. Just below it, add a tiny, upward-curving line for the mouth.
- The Body and Arm: Draw a "bean-shaped" torso extending from the collar. Add a simple line for the arm, usually tucked slightly behind the body or resting at the side.
- The Paw and Tail: Snoopy’s paws are simplified with three small finger-lines. The tail should be short, pointed, and angled slightly upward to show his perky nature.
- The Feet and Toes: Draw two elongated ovals for the feet. These provide the stable base that allows Snoopy to stand upright.
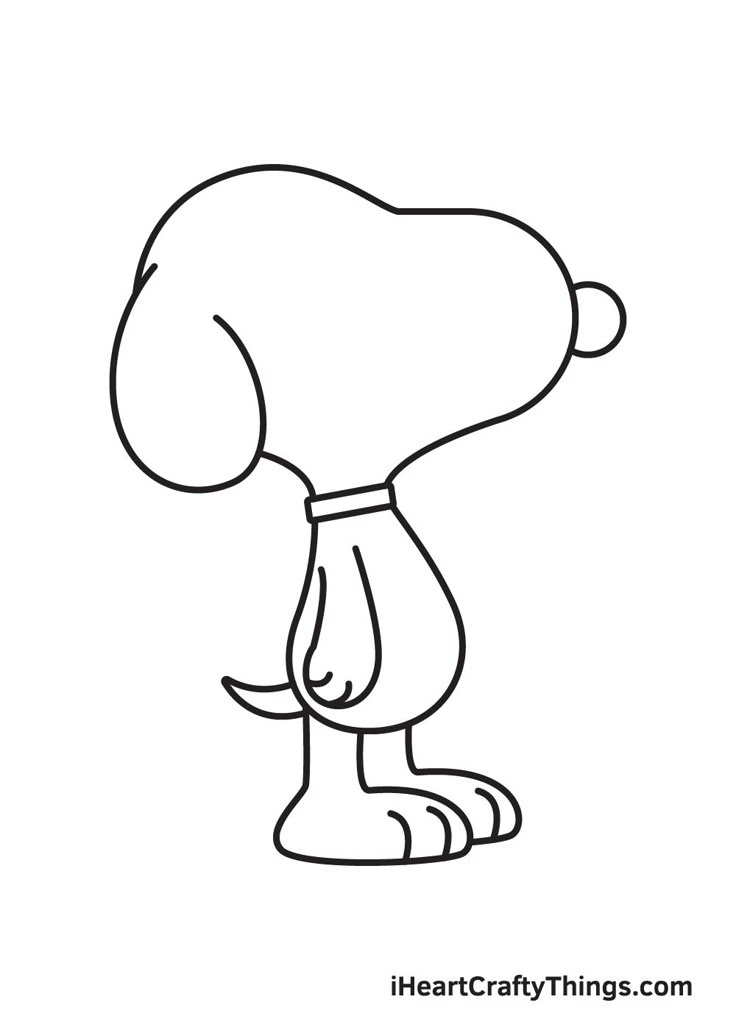
Image source: Pinterest
Which Snoopy Persona Outline Should You Choose for Your Project?
Snoopy is rarely just a dog; he is an actor in his own imagination. Choosing the right persona outline is vital for themed projects. Each version has specific visual requirements that must be present to be authentic.
The Classic Sleeper
The most common outline for nursery decor. It features Snoopy lying flat on his back atop his red doghouse. The key detail here is the "belly curve" and the way his ears drape over the sides of the roof.
The Flying Ace
Essential for adventure-themed crafts. This outline must include the leather aviator cap, the goggles pushed up onto the forehead, and the long, flowing scarf that suggests movement.
Joe Cool
The epitome of campus style. This version requires the specific "round" sunglasses profile and a leaning posture, often against a wall or a tree, with his paws crossed.
The Beagle Scout
Perfect for camping or outdoor projects. This outline includes the flat-brimmed scout hat and the neckerchief tied neatly around his neck.
Choosing the Right File Format for Your Digital Snoopy Outline
If you are downloading an outline from a marketplace like Etsy , you will likely encounter several file types. Choosing the wrong one can lead to pixelation or machine errors.
| Format | Best Use Case | Scalability | Transparency |
|---|---|---|---|
| SVG | Cricut, Silhouette, CNC | Infinite (Vector) | Yes |
| PNG | Digital Stickers, Web Art | Limited (Raster) | Yes |
| STL | 3D Printing | Fixed (3D Mesh) | No |
| JPG | Simple Paper Printing | Poor | No |
For most modern crafters, the SVG (Scalable Vector Graphics) is the gold standard. Unlike a JPG, which is made of pixels, an SVG is made of mathematical paths. This means you can blow up a Snoopy outline to the size of a billboard or shrink it down to a fingernail decal without losing any crispness in the lines.
How to Use Snoopy Outlines for Cricut and Silhouette Machines
Using a Snoopy outline for vinyl cutting requires a bit of technical finesse, especially when dealing with the character's small facial features. Many makers find that the "weeding" process—removing the excess vinyl—is the most challenging part of the project.
When importing your SVG into Design Space or Silhouette Studio, pay attention to the "path" of the eye and the collar. If the outline is too thin, the blade may tear the vinyl. A popular choice among experienced makers is to use a "solid" black Snoopy silhouette and layer white vinyl on top, rather than trying to cut a hollow outline. This provides more surface area for the adhesive to grip, ensuring your decal lasts longer on surfaces like water bottles or car windows.
Tips for Scaling Snoopy Patterns for Cross-Stitch and Embroidery
A common pain point in the crafting community involves the "scaling problem." For example, a user might have a Snoopy pattern that is 70 stitches tall, but their Aida cloth canvas only allows for 53 stitches. In these cases, you cannot simply "shrink" the pattern without losing the character's essence.
Instead of scaling the entire image, focus on "squatting" the doghouse. You can remove a few rows of stitches from the middle of the doghouse base without changing the look of Snoopy himself. However, never compromise on the head proportions. For the facial features, many experts recommend using a single-thread backstitch . While a full cross-stitch is great for the body, it can make Snoopy's delicate smile look "blocky" or distorted. A backstitch allows for the fluid, hand-drawn look that mimics Schulz's original pen strokes.
3D Printing Snoopy Outlines for Home Decor
With the rise of affordable 3D printers, many fans are now creating "floating" wall art using Snoopy STLs. These are typically flat models that are extruded just a few millimeters to create a 3D silhouette. According to resources on Printables.com , these models are among the top choices for quick, low-filament prints.
For the most "comic-accurate" look, use a matte black PLA filament. Glossy filaments can catch the light in ways that distract from the clean lines of the outline. If you are printing a Snoopy outline to be used as a cookie cutter, ensure you are using food-safe PETG filament and that the walls of the outline are at least 1.2mm thick to provide enough structural integrity to cut through dough.
Troubleshooting Common Snoopy Outline Issues
One of the most frequent issues crafters face is distortion . This usually happens when a user tries to resize an image without "locking" the aspect ratio. Because Snoopy's head is so large compared to his body, even a 5% stretch in one direction can make him look unrecognizable. Always ensure your software's "lock proportions" icon is active before resizing.
Another issue is the legal complexity of using these outlines. While it is generally acceptable to create Snoopy crafts for personal use, selling them can lead to copyright issues with Peanuts Worldwide LLC. Most Etsy sellers offer "personal use" licenses, but if you plan to sell items at a craft fair, you should be aware that the Snoopy likeness is a strictly protected intellectual property. Always check the licensing terms of any digital file you purchase.
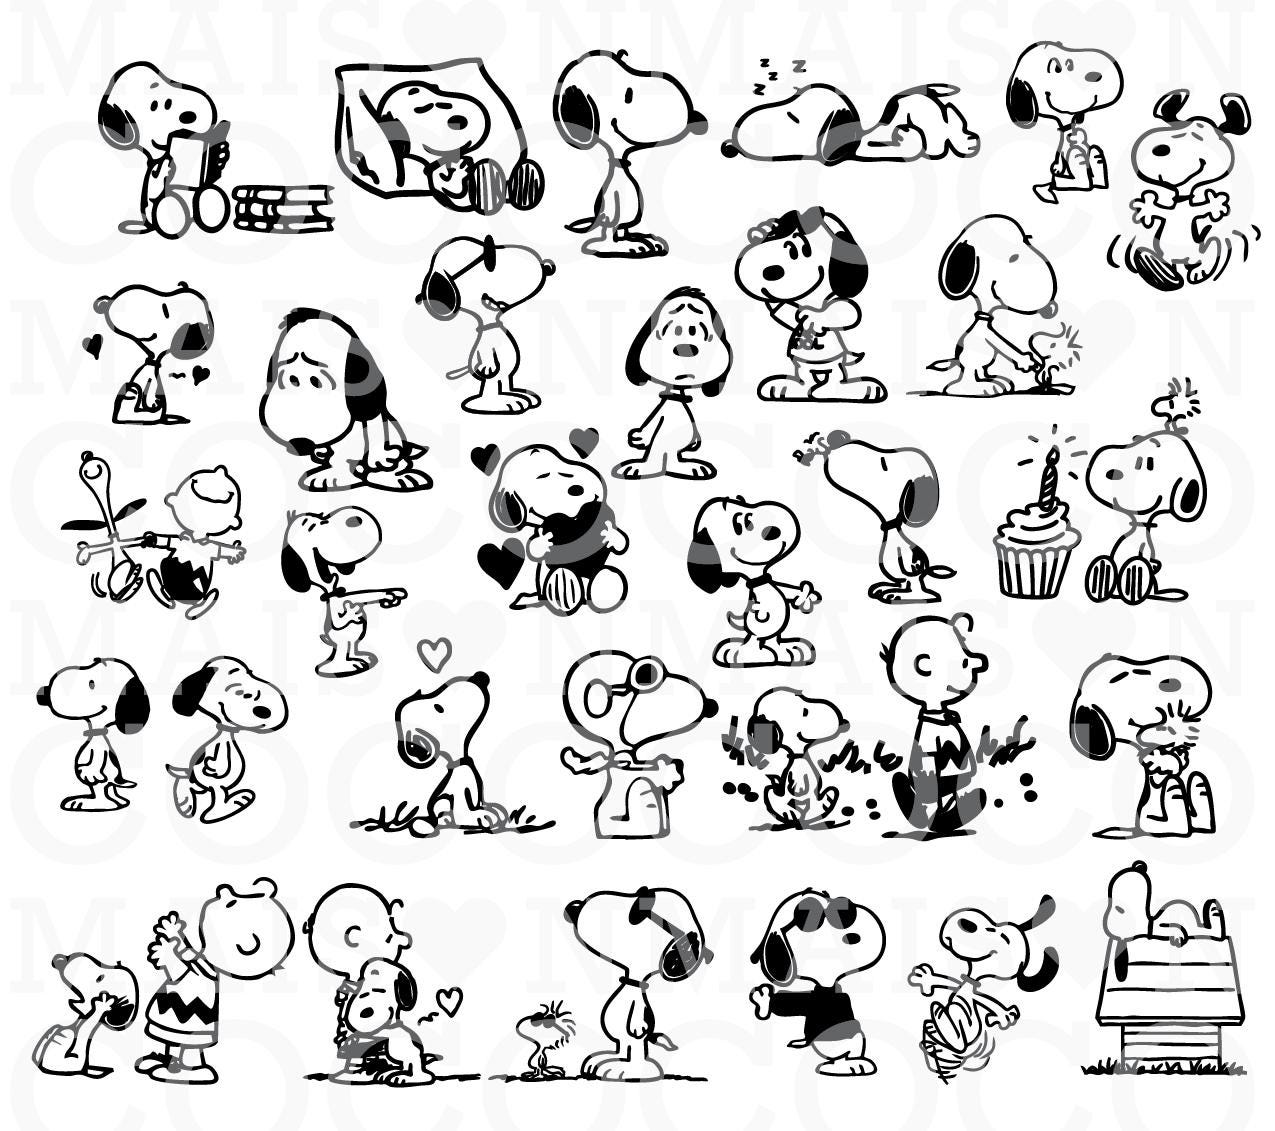
Image source: Etsy
Frequently Asked Questions About Snoopy Outlines
- How do I draw a simple Snoopy outline if I have no artistic skill?
- The easiest way is to use the "grid method." Draw a light 4x4 grid over a reference image and your paper. Focus on one square at a time, matching the curves of the outline to the grid lines. Alternatively, you can print a light-gray version of the outline and trace over it with a black felt-tip pen to build muscle memory.
- What is the best way to transfer a Snoopy outline onto wood for burning?
- Carbon paper is a highly effective tool for this. Place the carbon paper between your printed outline and the wood surface, then trace the lines with a ballpoint pen. The pressure will transfer a clean, dark line onto the wood, providing a perfect path for your wood-burning tool to follow.
- Why does my Snoopy SVG look jagged when I upload it to my cutting machine?
- This usually happens if the file was originally a low-resolution JPG that was "auto-traced" into an SVG. Auto-tracing often creates thousands of tiny, jagged points. To fix this, you may need to use a "simplify" tool in your design software or manually delete unnecessary anchor points to smooth out the curves.
- Can I use a Snoopy outline for a tattoo design?
- Yes, Snoopy's minimalist lines make him a popular choice for tattoos. However, most tattoo artists recommend slightly thickening the lines of the eye and collar, as very fine lines can "blur" or fade over time. A bold, traditional-style outline will hold its shape much better over the years.
- Is there a difference between the 1950s and 1990s Snoopy outlines?
- Significant differences exist. The 1950s Snoopy has a longer snout and smaller ears, resembling a real beagle. The 1990s version is the one most people recognize, with a larger, rounder head and a more upright posture. When searching for an outline, specify "vintage Snoopy" if you want the early 1950s look.
Summary of Best Practices for Snoopy Outlines
Mastering the Snoopy outline allows you to bring a piece of comic history into your home. Here are the key takeaways for your next project:
- Follow the Schulz Method: Always start with the slope of the head and the oval nose to ensure character accuracy.
- Choose SVGs for Digital Crafts: They offer the highest quality and prevent pixelation when resizing for Cricut or Silhouette.
- Use Backstitching for Fabric: This technique is a top choice for maintaining fine facial details in embroidery and cross-stitch.
- Respect the Persona: Ensure you include specific accessories like the Flying Ace's scarf or Joe Cool's sunglasses for themed projects.
- Lock Your Proportions: Never resize a Snoopy outline without locking the aspect ratio to avoid a distorted "off-brand" look.
- Check Your Licenses: Remember that while personal crafting is usually fine, commercial sale of Snoopy items requires official licensing.
Start your next project by practicing the head slope curve on a piece of scrap paper to get a feel for the character's unique flow.