Home
How to Draw a Spiderman Outline and Create Custom Webbed Art
A Spiderman outline is a foundational skill for both traditional illustrators and digital crafters. To create a professional-looking result, start with a basic egg-shaped head silhouette, place the eyes symmetrically using a center vertical guide, and apply radial webbing lines that follow the 3D curvature of the form. For makers using Cricut or Silhouette, ensuring a clean vector (SVG) format is essential for precise cutting and layering.
Why the Spiderman Outline Ranks Among the Top Choices for Artists
The Spiderman outline stands out as a top choice for artists because of its unique blend of simplicity and complexity. At its core, the character's silhouette is one of the most recognizable in pop culture, relying on athletic, dynamic poses rather than bulky armor or capes. This makes it an excellent subject for studying human anatomy and foreshortening. According to data from Pinterest , the term "Spiderman outline" generates over 9,000 monthly searches, reflecting a massive interest from hobbyists and professional makers alike.
For students and beginners, the outline provides a clear framework to practice line weight and symmetry. Unlike many other superheroes, Spiderman’s "costume" is essentially a second skin, meaning the outline must convey muscle tension and movement without the distraction of external accessories. This versatility extends to the crafting world, where clean line art is highly valued for vinyl cutting, screen printing, and laser engraving. Many creators even explore "crossover" outlines, such as the popular Hello Kitty Spiderman mashup, which combines the iconic webbing with different character silhouettes.
In recent years, the rise of digital art tools like Procreate and Adobe Illustrator has further cemented the Spiderman outline as a staple project. The ability to scale vector art without losing quality makes these outlines commercially valuable for assets sold on platforms like Etsy , where high-quality cut files are in constant demand. Whether you are a parent looking for a coloring page or a designer creating a poster, mastering this specific outline offers a gateway into professional-grade comic book illustration.
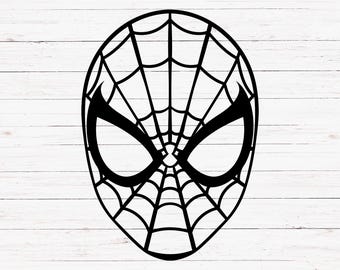
Image source: Etsy
How to Draw a Simple Spiderman Mask Outline Step by Step
Drawing the mask is the most common starting point for any Spiderman project. While it may look intimidating due to the intricate webbing, breaking it down into geometric steps makes it manageable for any skill level. The key is to focus on the underlying structure before worrying about the details of the suit.
Starting with the Egg Shape Base
Begin by drawing a light, vertical egg shape. This represents the head. It is important to keep your initial lines faint, as you will be refining the jawline and chin later. Depending on the version of Spiderman you are drawing (such as the classic Steve Ditko style or the modern MCU look), the jaw might be more rounded or more angular. A common technique is to draw a vertical line down the center and a horizontal line across the middle to help with feature placement.
Placing the Eyes for Different Suit Styles
The eyes are the most expressive part of the Spiderman outline. You have three primary styles to choose from:
- Classic Style: Smaller, more triangular eyes with a slight curve on the top edge.
- Ultimate Style: Very large, wide eyes that cover a significant portion of the face, often associated with Mark Bagley’s illustrations.
- MCU/Tech Style: Eyes with a distinct black border that can "squint" or change shape, mimicking a camera shutter.
Ensure the bottom of the eyes sits just above the horizontal center line you drew earlier. Symmetry is vital here; if one eye is slightly higher than the other, the entire mask will look off-balance.
Using the Center Point Technique for Webbing
The "Center Point" technique is a highly effective method for accurate webbing. Locate the bridge of the nose (the intersection of your vertical and horizontal guides). All radial lines of the web should originate from this single point. Draw these lines radiating outward like the spokes of a wheel. Once the radial lines are in place, you can begin adding the curved "scalloped" lines that connect them, creating the iconic web pattern.
Master the Geometry of Spiderman’s Webbing Pattern
The webbing is often where beginners struggle, but it follows a specific mathematical logic. Understanding the difference between radial lines and scalloped cross-sections will elevate your outline from a simple sketch to a professional piece of art. According to tutorials from professional illustrators , the webbing should always reflect the 3D volume of the head.
Radial Lines Versus Scalloped Cross-Sections
Radial lines are the straight (or slightly curved) lines that travel from the center of the face toward the outer edges. Scalloped lines are the "U" shaped curves that connect the radial lines. A common mistake is drawing these scalloped lines as flat, straight bars. To create a sense of depth, these lines should curve inward toward the center point, mimicking how a real web hangs between two points. This curvature helps the viewer perceive the roundness of the skull underneath the mask.
Maintaining Symmetry Across the Face
To maintain perfect symmetry, work on both sides of the face simultaneously. If you draw one scalloped curve on the left, immediately draw its mirror image on the right. This prevents the "drifting" effect where one side of the mask looks denser than the other. If you are working digitally, you can use a "Symmetry Tool" to ensure perfect results, but for traditional media, using a ruler to mark equal distances along the radial lines is a top-rated strategy.
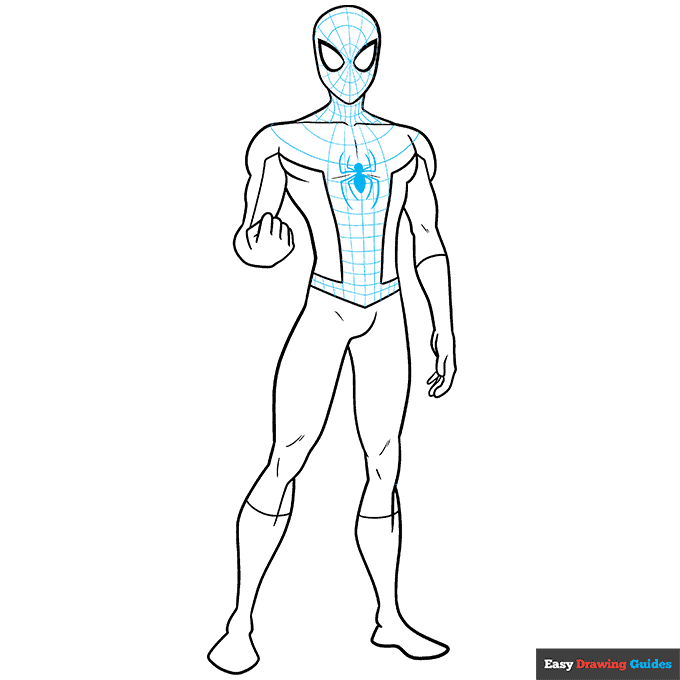
Image source: Easy Drawing Guides
Which Spiderman Pose Should You Choose for Your Outline?
Choosing the right pose depends on your goal. A standing pose is excellent for beginners, while a swinging pose offers a significant advancement in difficulty. Below is a framework to help you decide which direction to take your project.
| Pose Type | Difficulty | Best Use Case | Key Focus |
|---|---|---|---|
| Mask Only | Easy | Icons, Stickers, Quick Sketches | Symmetry & Eye Shape |
| Standing | Easy | Coloring pages, Basic posters | Proportions |
| Crouching | Medium | T-shirt designs, Comic layouts | Compression & Balance |
| Upside Down | Medium | Classic comic covers | Gravity & Tension |
| Swinging | Hard | Action scenes, Professional art | Foreshortening |
The "Upside Down" hang is widely regarded as one of the most iconic Spiderman looks. It tests your understanding of how the suit reacts to gravity. For example, the webbing on the chest might pull slightly upward, and the eyes might appear to "look up" toward the feet. Conversely, the "Dynamic Swing" requires a deep understanding of foreshortening—where the hand reaching toward the viewer is drawn much larger than the rest of the body to create a 3D effect.
How to Fix Common Cricut and Silhouette Cutting Issues with Spiderman SVGs
For the maker community, the Spiderman outline presents unique technical challenges. Many users report issues when importing "free" SVGs into software like Cricut Design Space or Silhouette Studio. Addressing these pitfalls early will save you hours of frustration and wasted material.
Solving the Missing Red Outline Problem
A frequent complaint in crafting groups is the "missing red outline" issue. This happens when an SVG is designed with overlapping layers rather than distinct paths. When you import the file, the software may only see the black webbing and "swallow" the red suit sections. To fix this, you must ensure your SVG uses a "knockout" design, where the webbing is literally cut out of the red background, or use the "Attach" function in Design Space to keep the layers synchronized during the cut process.
Using the Contour Tool Effectively
The Contour tool is a highly impactful feature for cleaning up complex Spiderman outlines. If your SVG has too many small, "chunky" pieces in the webbing that are difficult for your blade to cut, you can use Contour to hide those specific paths. This simplifies the design without losing the overall character aesthetic. Additionally, always check your "Node" count. High-quality SVGs from reputable sources like Vecteezy typically have simplified paths that won't crash your cutting software, unlike auto-traced images which often contain thousands of unnecessary points.
SVG (Vector)
Infinite scalability without pixelation. Ideal for Cricut, Silhouette, and professional printing. Supports layers.
PNG (Raster)
Best for digital use and simple printing. Supports transparency but will pixelate if enlarged too much.
Top Tools for Creating Professional Spiderman Line Art
The tools you choose will significantly influence the final look of your Spiderman outline. Whether you prefer the tactile feel of paper or the precision of a tablet, certain industry standards can help you achieve a "Marvel-style" finish.
Digital Tools: Procreate and Illustrator
For digital artists, Procreate is a leading choice due to its streamlined interface. Professional illustrators often recommend specific brush settings for inking Spiderman:
- Technical Pen: Use this for the main silhouette and eye borders. It provides a consistent line weight that feels clean and modern.
- Studio Pen: This is a top choice for the webbing. Because it responds to pressure, you can make the webbing lines thinner as they reach the center of the face and thicker toward the edges.
- Vectorizing: If you plan to sell your outlines, always finish the work in Adobe Illustrator. Using the "Pen Tool" to manually trace your sketch ensures the cleanest possible SVG for your customers.
Traditional Media: Pencils and Inking
If you are working traditionally, start with a Faber-Castell mechanical pencil (HB or 2B) for the initial light sketch. These pencils offer the precision needed for the tight webbing patterns. For inking, Sakura Micron pens are a popular choice. Use a 0.8mm tip for the outer silhouette and a 0.1mm or 0.05mm tip for the delicate webbing. This contrast in line weight is what gives comic book art its "pop" and professional depth.
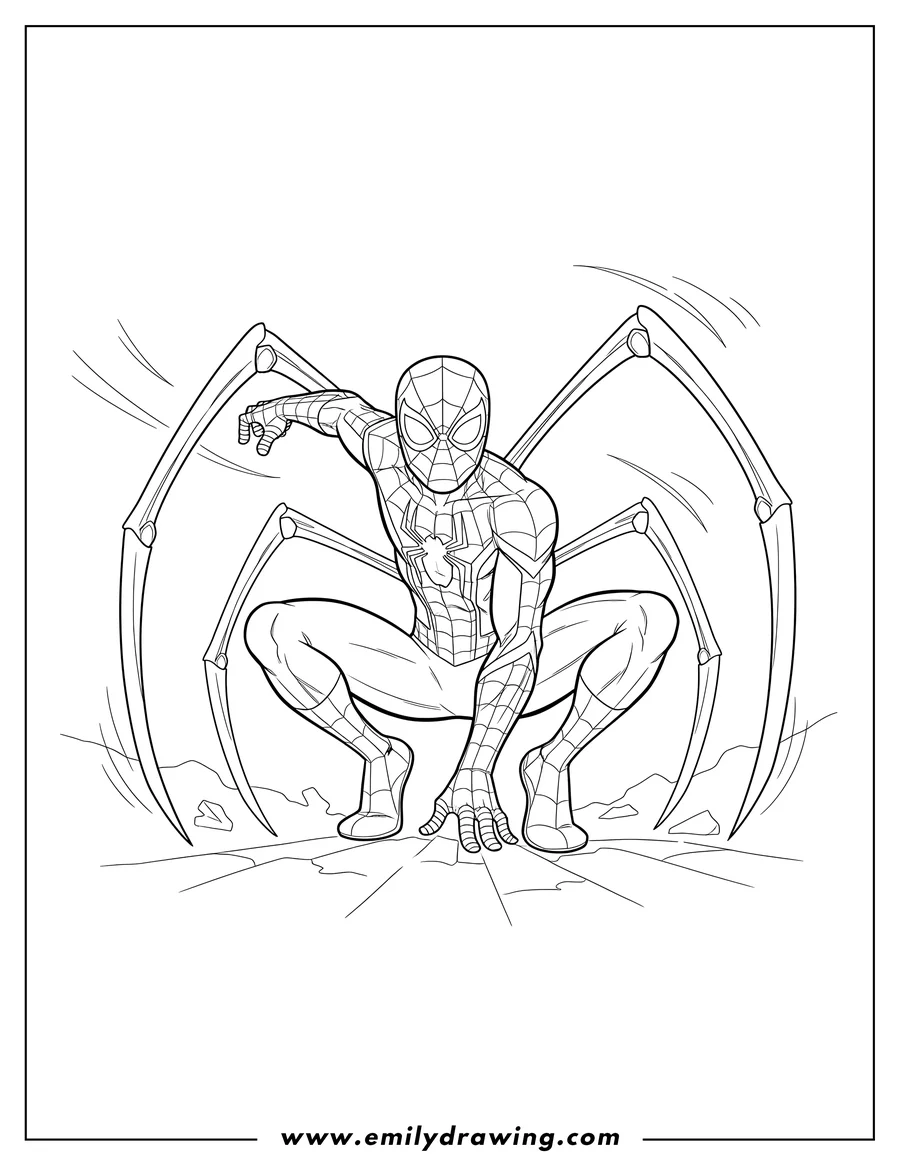
Image source: Emily Drawing
10 Fun Facts About Spiderman for Your Next School Project
If you are creating a Spiderman outline for a school assignment, adding these facts will provide excellent context and educational value.
Where to Find High-Quality Spiderman Outline Assets
Finding the right assets depends on your budget and intended use. For personal projects, free repositories are often sufficient, but commercial work requires a more careful approach.
- Free Options: Sites like Vecteezy offer a variety of royalty-free Spiderman vectors. However, these often require attribution and may not be optimized for complex cutting machines.
- Paid Options: Marketplaces like Etsy feature "cut-ready" SVGs for approximately $1.86. These are typically created by professional designers who have already simplified the nodes for Cricut and Silhouette users.
- Printables: For parents and teachers, sites like Coloring8 provide free PDF downloads of Spiderman outlines that are perfect for classroom activities.
Frequently Asked Questions
- Start with a basic egg-shaped silhouette to establish the head proportions before adding any suit details.
- Use a center point technique at the bridge of the nose to ensure all webbing lines radiate symmetrically.
- Apply curved scalloped lines instead of straight bars to convey the 3D volume and roundness of the character's form.
- Choose SVG formats for crafting projects to avoid pixelation and ensure compatibility with cutting software like Cricut.
- Vary your line weights by using thicker lines for the outer body and thinner lines for the intricate webbing pattern.
- Practice foreshortening in dynamic poses like swinging to add a professional, cinematic feel to your artwork.
- Utilize the Contour tool in digital software to simplify complex paths and prevent cutting errors on physical materials.
Grab your favorite drawing tool or open your design software and start practicing these techniques to create your own professional Spiderman line art today.