How to Create a Viral Skull Edit for TikTok and Gaming Profile Pictures
Quick Summary
A
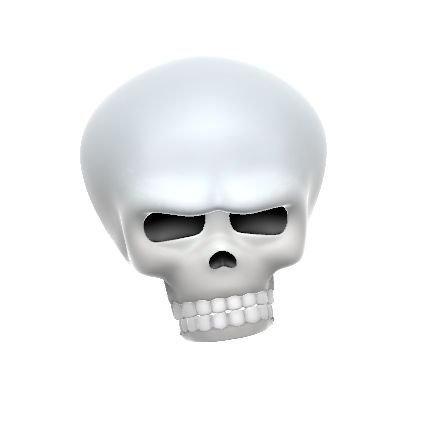
skull edit
is a high-energy visual trend combining dark aesthetics, Phonk music, and AI-driven skeleton overlays. To create one, most creators use
CapCut templates
for speed or
After Effects
for professional-grade motion shakes. The core technique involves syncing a "freeze frame" transition to a heavy bass drop, typically using a 0.1-second lead time for maximum impact.
The digital landscape of 2026 is dominated by high-contrast, aggressive visual styles, and few trends have maintained the staying power of the skull edit. Originally emerging from the intersection of underground Phonk music culture and gaming montages, this aesthetic has evolved into a sophisticated art form. Whether you are looking to boost your TikTok engagement or design a striking profile picture (PFP) for Discord, mastering the skull edit requires a blend of rhythmic timing and technical layering.
In recent months, the trend has shifted from simple static overlays to hyper-realistic AI skeleton tracking. Creators are no longer just placing a skull over their face; they are using tools that map the skeletal structure to their actual movements, creating a seamless "Angel vs. Demon" transformation. This article explores the specific workflows, from mobile-first templates to advanced desktop VFX, ensuring your content stands out in a crowded feed.
What Is the Skull Edit Trend and Why Is It Viral?
The skull edit trend is defined by its "Dark Vibes Only" aesthetic, a term popularized by creators like
cyberbullterrier
. At its heart, the trend is about transformation. It usually begins with a standard video clip—often a person looking into the camera or a gaming highlight—that suddenly "glitches" into a skeletal version of the subject as the music hits a bass drop.
The virality of this trend stems from its sensory intensity. The combination of high-frequency "Phonk" beats and rapid-fire visual shakes triggers a strong psychological response in viewers, making it highly rewatchable. According to community data, these edits often see higher-than-average completion rates on short-form platforms because the "payoff" (the skull reveal) is perfectly timed to the audio.
Beyond the visuals, the trend has birthed several sub-genres. The "Angel vs. Demon" skit uses the skull edit to represent a character's dark side during a confrontation, while the "Emoji Troll Face" crossover blends the skull aesthetic with classic internet memes. This versatility ensures that the trend remains fresh, even as platform algorithms evolve.
A typical transformation showing the transition from a standard portrait to a stylized skull overlay.
Image source:
YouTube
How to Use CapCut Skull Edit Templates for Fast Results
For most creators,
CapCut templates
are the most efficient way to join the trend. These templates automate the complex keyframing and masking required for a professional look, allowing you to produce a viral-ready video in minutes.
Finding the Right Template
When searching the CapCut interface, look for keywords like "Skull Edit 2 Clips" or "4 Clips." The "2 Clips" version is ideal for a simple before-and-after reveal, while the "4 Clips" version is designed for high-energy montages. In 2026, the "40 Secs 4 Clips" workflow has become a benchmark for creators who want to showcase multiple gaming highlights or outfit changes within a single Phonk track.
The 40-Second Workflow
To use these templates effectively, follow this streamlined process:
Import Your Assets:
Select your primary video and the skull overlay clip. If you don't have a skull clip, many templates include a built-in AI filter.
Align the Beat:
CapCut templates usually have "Match Cut" markers. Ensure your transition happens exactly on the yellow dot in the timeline.
Customize the Music:
While templates come with default audio, swapping them for trending Phonk tracks can significantly increase your reach.
Adjust the Intensity:
Use the "Adjust" tool to increase contrast and lower the brightness of your human clip to make the skull reveal more dramatic.
How to Make a Skull Edit Manually on Your Phone
While templates are convenient, manual editing allows for greater creative control and helps avoid the "cookie-cutter" look that can sometimes hinder growth. Creating a manual skull edit involves four primary stages.
The Freeze Frame Technique:
Record your video and identify the exact moment you want the transformation to occur. Use the "Freeze" tool in your mobile editor to create a still image of that frame. This still image will serve as the base for your skull overlay.
Applying the AI Skeleton Filter:
Modern mobile apps now feature realistic skeleton filters that track facial movements. Apply this filter to your freeze frame. If you are using a static PNG instead, use the "Overlay" function and the "Chroma Key" tool to remove any background from the skull image.
Adding Motion Shakes:
A skull edit is incomplete without the "Phonk Shake." In your effects menu, look for "Meme Shake" or "Vertical Shake." Set the speed to high (70-90) and the intensity to medium (40-50) to mimic the aggressive vibration of a heavy bass speaker.
Layering Green Screens:
For a more professional look, download a "Skull Green Screen" asset. Place it on a new track above your video, use the "Remove Background" or "Chroma Key" tool, and set the blending mode to "Screen" or "Lighten" to ensure the glowing eyes pop against the dark background.
Pro Tip: The 0.1 Second Rule
To make a transition feel truly impactful, place the visual skull reveal exactly 0.1 seconds *before* the audio beat hits. This slight anticipation creates a more satisfying "hit" for the viewer's brain than a perfectly simultaneous sync.
Advanced Techniques for After Effects and Filmora Users
If you want to move beyond the limitations of mobile apps, desktop software like Adobe After Effects or
Wondershare Filmora
offers high-fidelity tools for professional VFX. Desktop editing allows for manual displacement mapping, which creates a more organic "glitch" effect than mobile presets.
Specific Keyframe Values for Phonk Shakes
One of the biggest differences between a amateur and professional skull edit is the quality of the shake. In After Effects, using the
S_Shake
plugin (or the native Wiggler tool) with these specific values ranks among the top methods for achieving the viral look:
Setting
Recommended Value
Effect on Visual
Amplitude
1.5 – 2.0
Controls how far the image moves from the center.
Frequency
8.0 – 12.0
Controls how fast the image vibrates.
Motion Blur
Enabled (180°)
Adds realistic smearing to the movement.
Z-Shake
0.5
Adds a slight "pulsing" zoom effect to the beat.
Manual Glitch Transitions
Instead of using a pre-made glitch effect, try using a
Displacement Map
. By using a noise texture as a map, you can make the skull appear to "tear" through the human face. This technique is widely regarded as a superior way to handle transitions because it reacts to the specific contours of the subject's face rather than applying a flat filter.
How to Fix Audio Sync and Talking Skull Glitches
A common pitfall identified in community forums like the
Haunt Forum
is the "talking skull" glitch. This occurs when the skull's mouth animation or glow reacts to background noise—like thunder or a heavy bass line—instead of the intended dialogue.
Solution: Frequency Splitting
To ensure the skull only "speaks" when you do, use frequency splitting. Most professional editors allow you to isolate the mid-range frequencies (where the human voice typically sits). By applying your animation triggers only to this isolated track, you prevent the heavy Phonk bass from accidentally triggering the skull's mouth movements.
Audio Ducking Tips
If your music is drowning out the "transformation" sound effects, use audio ducking. Set the music track to automatically lower its volume by 3-5 decibels whenever the "demon" dialogue or the transition sound effect plays. This ensures the narrative elements of your skull edit remain clear even during intense musical segments.
How to Create a Static Skull Edit for Gaming PFPs
Not every skull edit needs to be a video. With over 12,000 monthly searches for
skull edit ideas on Pinterest
, static versions have become a top choice for gaming profile pictures. Using Photoshop or Canva, you can achieve a high-end look without touching a timeline.
Photoshop and Canva Workflow
The secret to a professional PFP lies in
Blending Modes
. When you place a skull PNG over a photo, the "Normal" mode looks like a sticker. Instead, try these settings:
Screen / Linear Dodge:
Use these for glowing eyes or magical sparks. They remove the black background and make the light appear to emit from the image.
Multiply:
Use this for bone textures. It allows the shadows of the skull to blend into the skin tones of the underlying photo.
Overlay:
A popular choice for adding subtle "glitch" textures or scanlines over the final image.
Color Grading for the "Dark Vibes" Look
To get the signature 2026 look, you must "crush the blacks." In your editor's Curves tool, pull the bottom-left point slightly upward and to the right. This creates a faded, matte black look that is a hallmark of the Phonk aesthetic. Increase the saturation of a single accent color (like neon green or purple) while desaturating everything else to make the edit pop.
Static skull assets are frequently used to create custom gaming profile pictures for Discord and Steam.
Image source:
Pinterest
How to Time Your Narrative for Angel vs Demon Skits
The most successful skull edits aren't just visual displays; they tell a short story. The "Angel vs. Demon" sub-trend, often influenced by creators like
Tedz.vfx
, relies on dramatic tension followed by a sudden release.
The Narrative Structure
A standard 7-second skit follows this pattern:
0-3 Seconds (The Setup):
The "Angel" or human character is shown in a vulnerable or calm state. The music is usually a melodic intro.
3-4 Seconds (The Conflict):
A sudden movement or dialogue line (e.g., "Don't push me") creates tension.
4-7 Seconds (The Reveal):
The beat drops, the skull edit triggers, and the "Demon" persona takes over.
Dialogue Synchronization
If your edit includes dialogue, the visual flip must happen on the first consonant of the most aggressive word. For example, if the line is "I am the monster," the skull should appear exactly as the "M" in "monster" is pronounced. This creates a visceral connection between the sound and the image that viewers find highly engaging.
Where to Find Free Skull Edit Green Screens and PNGs
High-quality assets are the foundation of a great edit. While many sites offer paid packs, several reputable sources provide free-to-use materials for the community.
Creators like
cyberbullterrier
often share link-in-bio folders containing "Dark Vibes" overlays. Additionally, the CapCut asset library itself has seen a significant expansion in 2026, now including high-definition 3D skull renders that can be used without external downloads. When searching for assets, always prioritize "Transparent PNGs" or "Green Screen MP4s" to save time on masking.
Safety Warning:
Avoid "broken link" template sites or third-party APKs promising "unlocked" effects. Stick to verified platforms like the official CapCut desktop app or reputable creator-led Discord servers to ensure your device remains secure.
All trademarks, copyrighted content, and quoted material referenced in this article belong to their respective owners. Brief excerpts are used under fair use (17 U.S.C. § 107) for purposes of commentary, criticism, and informational reporting. This article is not affiliated with or endorsed by TikTok, ByteDance, or the featured creators.
Frequently Asked Questions
What is the best app for a skull edit?
While "best" is subjective, CapCut is widely considered the top choice for mobile users due to its massive library of community-made templates and automated AI filters. For those seeking professional-grade customization and higher resolution, Adobe After Effects remains the industry standard, offering superior control over keyframing and displacement mapping.
How do I get the skull to follow my face perfectly?
In 2026, the most effective way to achieve this is through AI-powered face tracking filters. In CapCut, these are found under the "Body Effects" or "Face Effects" tab. If you are editing manually, you will need to use "Motion Tracking" (in After Effects) or "Keyframing" (in mobile apps) to manually pin the skull overlay to your nose and eyes as you move.
Why is my skull edit blurry after exporting?
Blurriness usually stems from a resolution mismatch. If your skull PNG is low-resolution (e.g., 720p) but your video is 4K, the overlay will look pixelated. Always aim for 1080p or higher assets. Additionally, ensure your export settings are set to at least 30fps (60fps is preferred for Phonk edits) and a high bitrate to prevent compression artifacts during the fast motion shakes.
Can I make a skull edit on an iPhone or Android?
Yes, the majority of viral skull edits are created entirely on mobile devices. Apps like CapCut, Alight Motion, and VN Video Editor provide all the necessary tools, including chroma key, blending modes, and shake effects. The mobile workflow is actually faster for most creators than the desktop alternative due to the availability of pre-made templates.
What music is typically used in these edits?
The trend is almost exclusively paired with "Phonk" music—a subgenre of hip-hop characterized by distorted bass, cowbell melodies, and dark atmospheric samples. In 2026, "Brazilian Phonk" and "Drift Phonk" are the most popular variations used for skull edits because their aggressive tempo changes provide perfect markers for visual transitions.
Key Takeaways for a Viral Skull Edit
1. Choose Your Platform:
Use CapCut for speed and templates, or After Effects for high-fidelity manual VFX.
2. Select High-Quality Audio:
Pick a Phonk track with a clear, heavy bass drop to anchor your transitions.
3. Master the 0.1s Rule:
Trigger your visual transformation slightly before the audio beat for maximum impact.
4. Use AI Tracking:
Leverage 2026-standard skeleton filters to ensure the skull moves naturally with the subject.
5. Optimize Blending Modes:
Use "Screen" for glows and "Multiply" for textures when creating static PFPs.
6. Fix Audio Sync:
Use frequency splitting to ensure the skull only reacts to vocals, not background noise.
7. Export for Smoothness:
Always export in 1080p at 60fps to maintain the clarity of fast motion shakes.
Start by downloading a high-quality Phonk track and mapping your first transition today.
 Home