Home
How to Create a High-Quality 4K Sukuna Edit for TikTok and Instagram
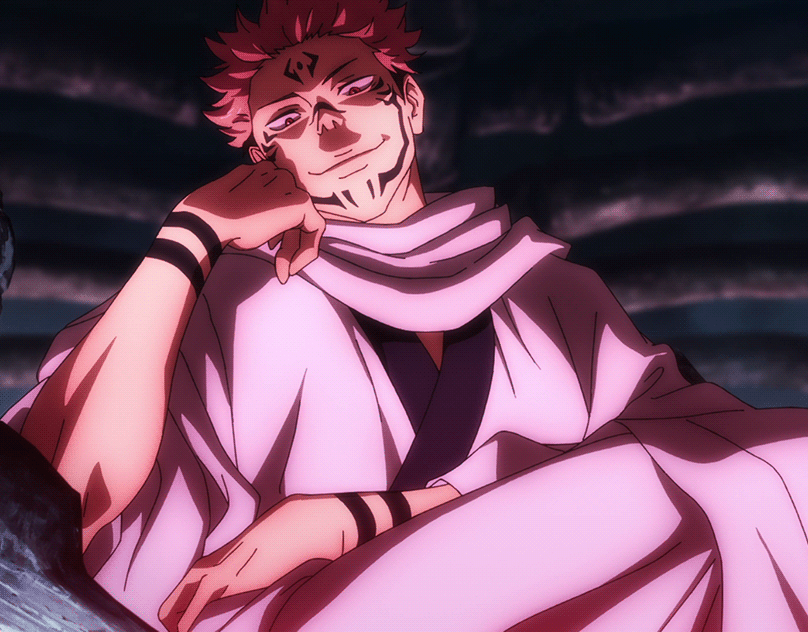
Image source: Behance
Why Sukuna Edits Dominate the Anime Community
Ryomen Sukuna, the undisputed King of Curses from Jujutsu Kaisen , has become a central figure in the anime editing world. His visual design—characterized by intricate tattoos, multiple eyes, and the terrifying Malevolent Shrine—provides a rich canvas for editors to experiment with high-contrast lighting and aggressive visual effects. According to data from Instagram , the #SukunaEdit tag has amassed over 1.6 million reels, highlighting the character's massive appeal.
The popularity of these edits stems from what the community calls the "Aura Factor." Sukuna’s presence in the series is defined by overwhelming power and a lack of restraint, which editors translate into "hard" transitions and heavy bass-driven music. Unlike protagonist-focused edits that often highlight emotional growth, Sukuna edits focus on dominance, speed, and visual flair.
The classic Yuji-host version. Focuses on the fire-based attacks against Jogo and the sheer destruction of the Shibuya Incident.
The Megumi-host version. These edits often lean into a more calculated, sinister aesthetic, highlighting the "Mahoraga" summoning and tactical brilliance.
The four-armed "True Form." Since this form appears later in the manga, editors often use high-end fan animations or "manga-motion" clips to showcase his original power.
In recent months, specific sub-genres have emerged. The "Dadakuna" trend, for instance, portrays Sukuna in an ironically protective role, while "Fake Collage" layouts use layered frames to create a moving scrapbook effect. Regardless of the sub-genre, the goal remains the same: to capture the character's terrifying presence through technical precision.
Where to Find High-Quality Sukuna Scenepacks Without Watermarks
The most common mistake beginner editors make is using screen-recorded clips from streaming platforms. Screen recording introduces compression artifacts and often includes UI elements or watermarks that ruin the visual integrity of the final product. To create a professional-looking edit, you must source "scenepacks"—collections of raw, high-bitrate clips.
Resource hubs like Telegram have become the gold standard for sourcing these files. Channels such as @editing_news are widely regarded as top-tier sources for non-watermarked anime raws. These clips are usually provided in 1080p or 4K, allowing for significant zooming and cropping without losing detail. According to kyren_ae , using these raw files is the first step toward achieving viral quality.
Top Episodes for Sukuna Clips
- Season 2, Episode 16: Sukuna vs. Jogo. Features incredible fire animation and high-speed movement.
- Season 2, Episode 17: Sukuna vs. Mahoraga. The peak of the Shibuya Arc, offering some of the most fluid combat sequences in modern anime.
- Season 1, Episode 4: The first appearance of the Malevolent Shrine, perfect for "aura" shots and domain expansion sequences.
Beyond Telegram, many creators share Mega or Google Drive links through "Edit for Edit" (E4E) communities on Discord and TikTok. These packs often include "log" footage—clips with flat color profiles that are ideal for custom color grading. When searching for these, look for terms like "Sukuna 4K Scenepack" or "JJK Raw Clips" on platforms like Pinterest or specialized YouTube channels.
The Professional Workflow for 4K 60FPS Anime Edits
Achieving the crisp, fluid look seen in top-tier edits requires a multi-step technical workflow. It isn't just about the software; it's about how you prepare the footage before the first cut is even made. Many creators now use AI upscaling tools to push standard 1080p broadcast footage into the 4K realm.
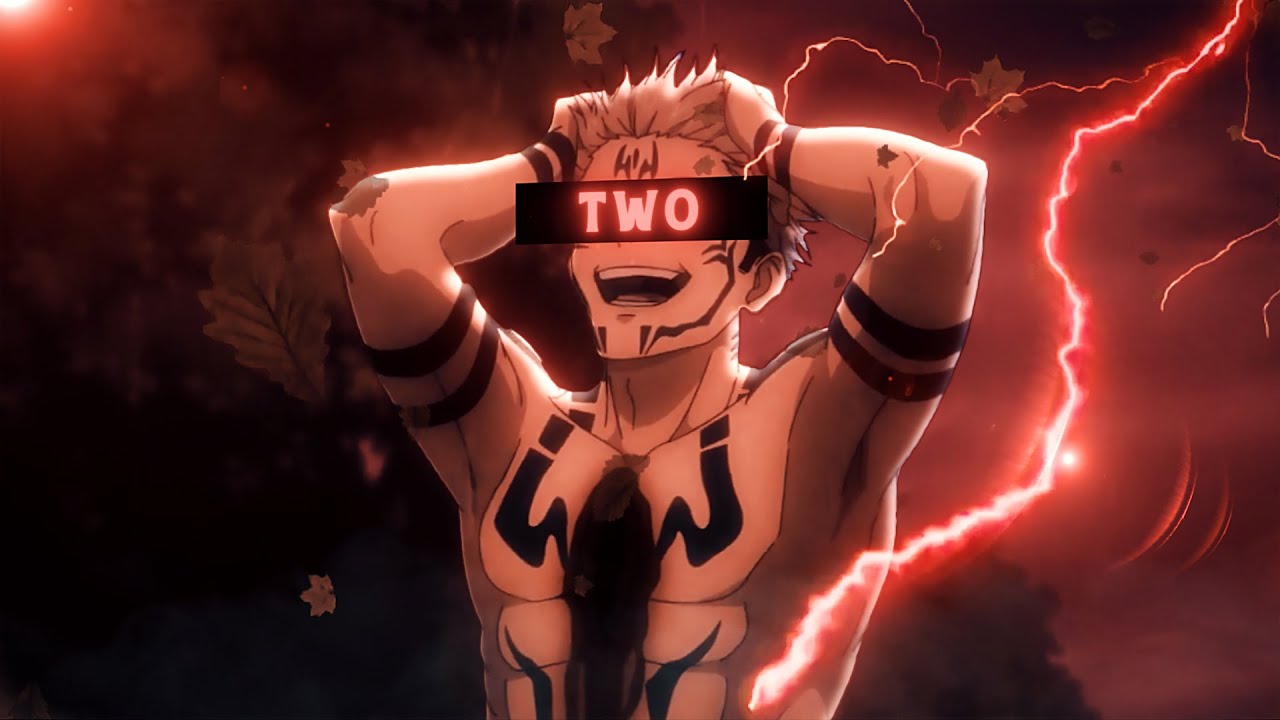
Image source: YouTube
The process typically begins with Topaz Video AI or mobile alternatives like Wink. These tools use neural networks to fill in missing pixels and smooth out jagged edges, which is essential when you plan to apply heavy sharpening or color correction later. Once the footage is upscaled, the choice of software determines the complexity of the effects you can achieve.
| Feature | CapCut (Mobile/Desktop) | After Effects (Desktop) |
|---|---|---|
| Learning Curve | Low - Beginner Friendly | High - Professional Level |
| Motion Graphics | Basic Templates | Advanced/Custom |
| Color Grading | Filters & Basic Sliders | Professional Lumetri/Plugins |
| Export Quality | Good (Compressed) | Excellent (Lossless options) |
The Visual FX Stack
To make a Sukuna edit stand out, editors often apply a specific "stack" of effects. This isn't just one filter; it's a combination of layers designed to emphasize the character's cursed energy. A common stack includes:
- RGB Split: A slight separation of red, green, and blue channels to create a "glitch" or "vibrating" effect during high-impact moments.
- Selective Glow: Using masking to apply a glow effect specifically to Sukuna’s eyes or tattoos, making them pop against dark backgrounds.
- Block Glitch: Short bursts of digital distortion that sync with heavy bass hits in the music.
- Deep Red CC (Color Correction): Pushing the shadows toward purple and the highlights toward a blood-red hue to match the character's theme.
How to Master the Tiki Phonk Aesthetic and Pacing
Music is the heartbeat of any Sukuna edit. While various genres are used, Tiki Phonk and Montagem have become the definitive sounds for the King of Curses. These genres are characterized by distorted cowbell melodies and aggressive, punchy basslines that demand a specific style of editing known as "Velocity."
The "0.5s Rule" is a common technique used by professional editors. This involves making cuts every 0.5 to 1.5 seconds, perfectly synced to the snare or kick drum of the track. This rapid pacing keeps the viewer engaged and matches the frantic energy of Sukuna’s combat style. As noted in tutorials by corzpy , the key is to use "Speed Ramping"—slowing down the clip just before a hit and accelerating it immediately after.
- Tiki Phonk
- A sub-genre of Phonk music featuring tropical-style percussion mixed with aggressive Brazilian funk bass.
- Velocity Editing
- A style where the speed of the video is manipulated to match the rhythm of the music, creating a "pulsing" effect.
- Beat Shakes
- Small, rapid camera movements applied to the video frame exactly when the bass hits.
Secret Export Settings to Keep Your Edits 4K on Social Media
One of the most frustrating experiences for an editor is spending hours on a 4K project only for it to look blurry once uploaded to TikTok or Instagram. This happens because social media platforms use aggressive compression algorithms to save bandwidth. To combat this, you need to use specific export settings that "trick" the platform into maintaining higher quality.
The "Upload in HD" toggle in the TikTok app is often insufficient. Instead, you should focus on the Bitrate and Codec during the export phase in your editing software. For mobile editors using CapCut, setting the resolution to 1080p (rather than 4K) can sometimes result in a cleaner upload because it avoids the platform's secondary downscaling process.
The "Pro" Export Recipe
- Format: MP4 (H.264). This is the most widely supported codec and offers a great balance between quality and file size.
- Resolution: 1080 x 1920 (Vertical). While 4K is great for editing, 1080p is the native resolution for most mobile screens.
- Frame Rate: 60 FPS. If your source material is 24 FPS, use optical flow or frame blending to reach 60 FPS for that "smooth" anime look.
- Bitrate: 15–20 Mbps. Going higher than 30 Mbps often triggers the platform's "heavy compression" mode, which can actually make the video look worse.
- Smart Sharpen: Apply a slight sharpen effect (around 10-15%) to the entire video before exporting to counteract the softening caused by compression.
Troubleshooting Common Sukuna Editing Problems
Even with the right tools, you may encounter technical hurdles. One frequent issue is Quality Loss during the editing process. This usually happens when a clip is resized or re-exported multiple times. To fix this, always work with the highest resolution source possible and avoid "nesting" or "pre-composing" clips more than necessary.
Another common struggle is Removing Existing Watermarks . If you find a perfect clip that already has a small logo, you can use "Content-Aware Fill" in After Effects or the "Blur/Overlay" method in CapCut. However, the most effective solution is always to find a cleaner scenepack. As highlighted by Noctryxae , the quality of your raw footage is the single most important factor in the final result.
Finally, Copyright Mutes can kill a viral edit instantly. Beyond using slowed versions of songs, you can also try shifting the pitch of the track by 1-2% or adding a very quiet layer of "ambience" (like wind or fire sounds) over the music. This changes the audio fingerprint enough to often avoid automated strikes while keeping the song recognizable to your audience.
Frequently Asked Questions
Where can I download Sukuna raw clips for free?
What is the best CapCut template for a Sukuna edit?
Why do my edits look blurry on TikTok even in 4K?
How do I make Sukuna's eyes glow in an edit?
What song is used in the famous Sukuna vs. Mahoraga edit?
Key Takeaways for Your Next Sukuna Edit
- Source 4K Scenepacks: Avoid screen recordings; use raw, non-watermarked clips from Telegram or Mega links.
- Master the Pacing: Use the 0.5s–1.5s cut rule to sync your transitions with Phonk or Montagem beats.
- AI Upscaling: Use tools like Topaz or Wink to enhance 1080p footage before you start editing.
- Visual FX Stack: Combine RGB splits, selective glows, and deep red color correction for the "King of Curses" aesthetic.
- Optimize Exports: Use H.264 at 1080p with a 15-20 Mbps bitrate to maintain quality on social media.
- Bypass Mutes: Use slowed + reverb audio versions to avoid copyright strikes on trending tracks.
Start your project by downloading a high-bitrate scenepack from the Shibuya Arc and experimenting with speed ramping to match the bass hits of your favorite Phonk track.